
1. Create shift Periods
A shift Period is a reusable time slot, such as Morning Shift, 8:00 a.m.–4:00 p.m. A shift table is the dated roster that places time slots on particular days and connects employees to them.
Before you begin, gather shift names, start and end times, workdays, effective dates, and any date ranges for rotating periods.
Create each named shift Period. Periods within the same plan must not overlap.
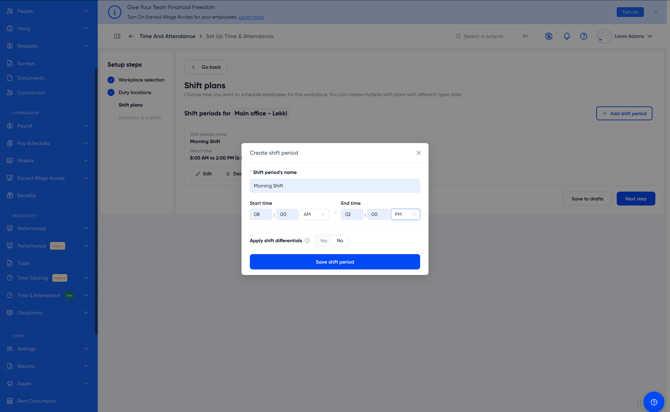
Click on Add Shift period
-
Input the Shift Period Name
-
Enter start and end time
-
Select yes/no to apply shift differentials
2. Create Shift Table
-
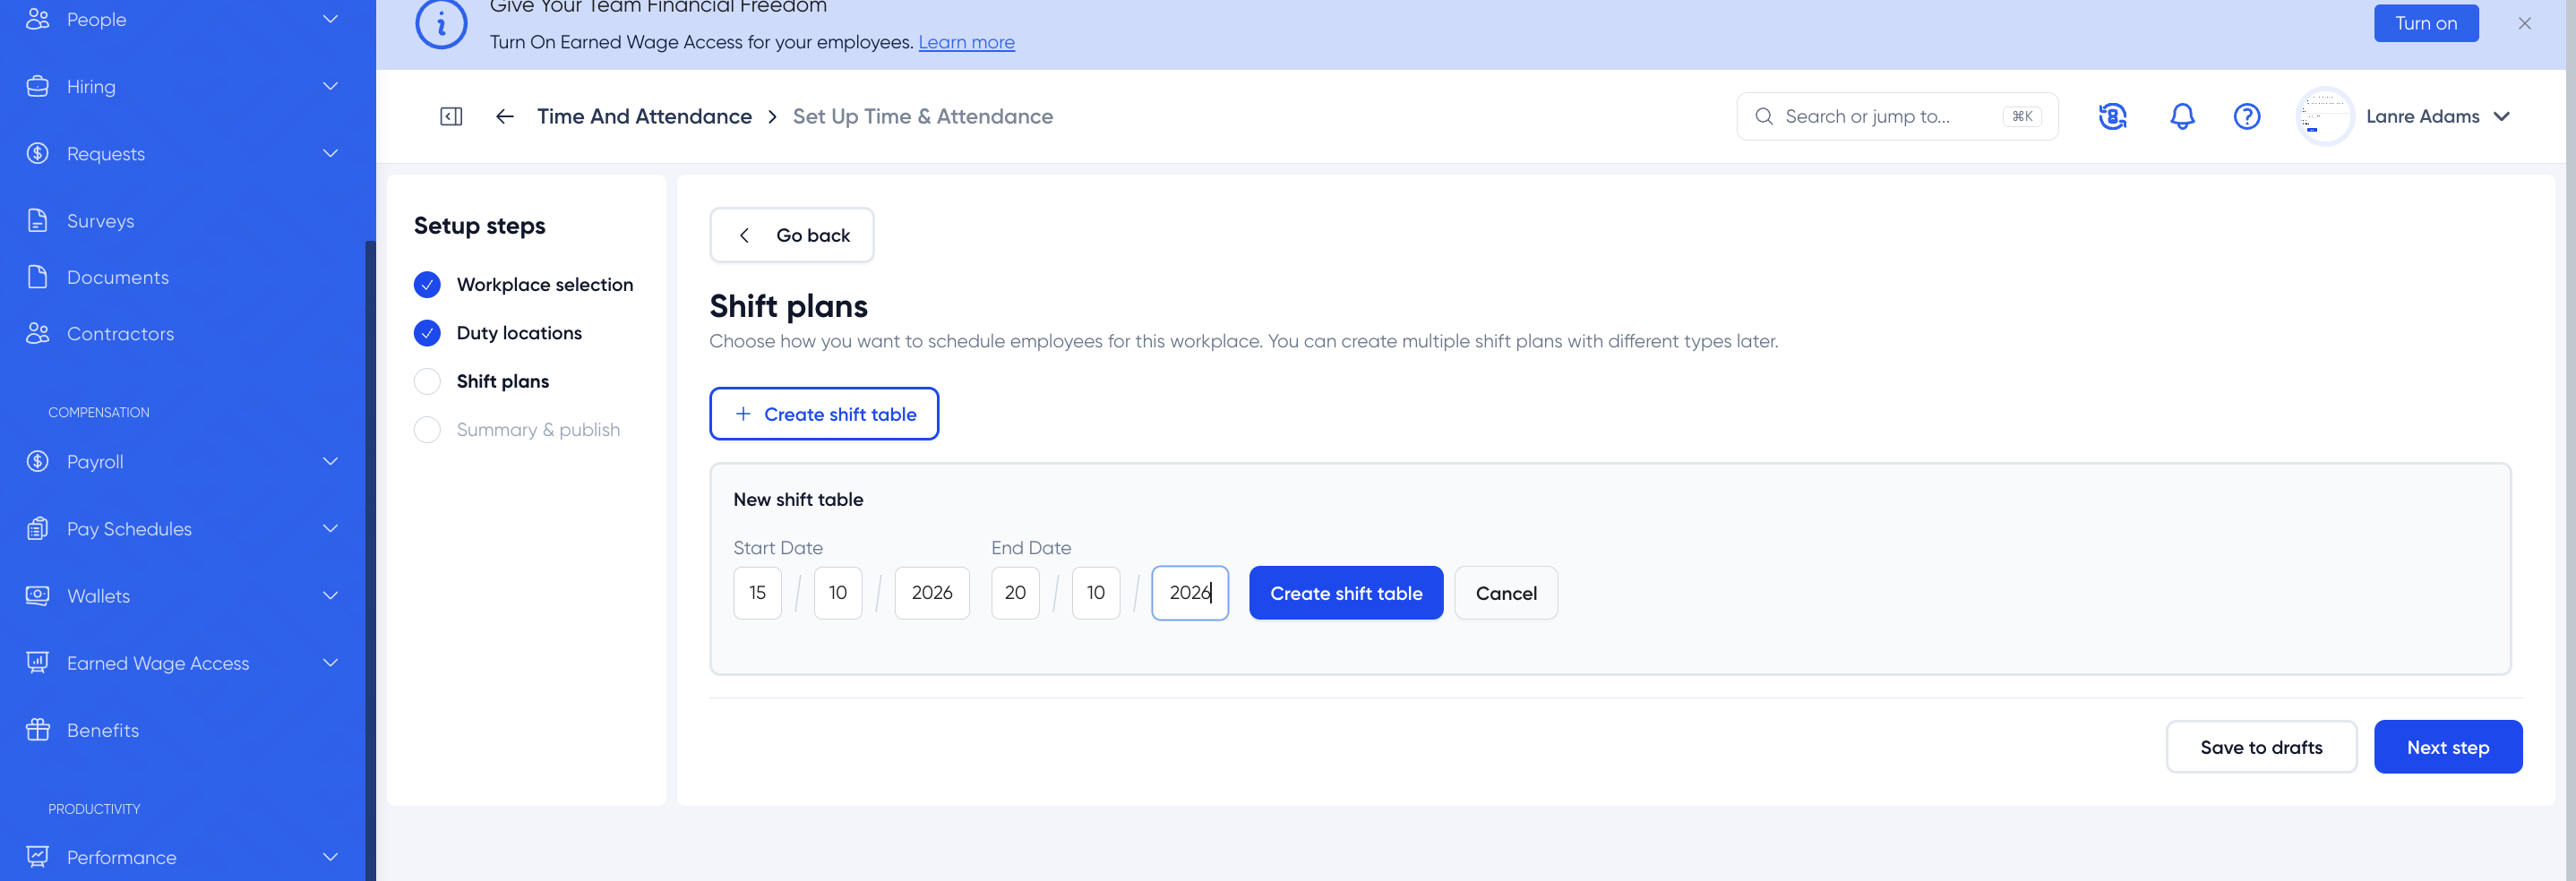
Click on Create shift table
-
Enter start and end dates that fall within the parent shift plan’s start and end dates.
-
For a Rostered plan, assign employees to periods and days.
-
For a Flexible plan, set the eligible days and available periods, then set an individual weekly minimum for each employee.
Check your schedule: Confirm that periods, dates, assignments, and individual weekly minimums match the source schedule. Remember that a Flexible minimum is a shift count, not an hourly limit; employees may work additional eligible shifts after meeting it.
Assign employees to a shift plan
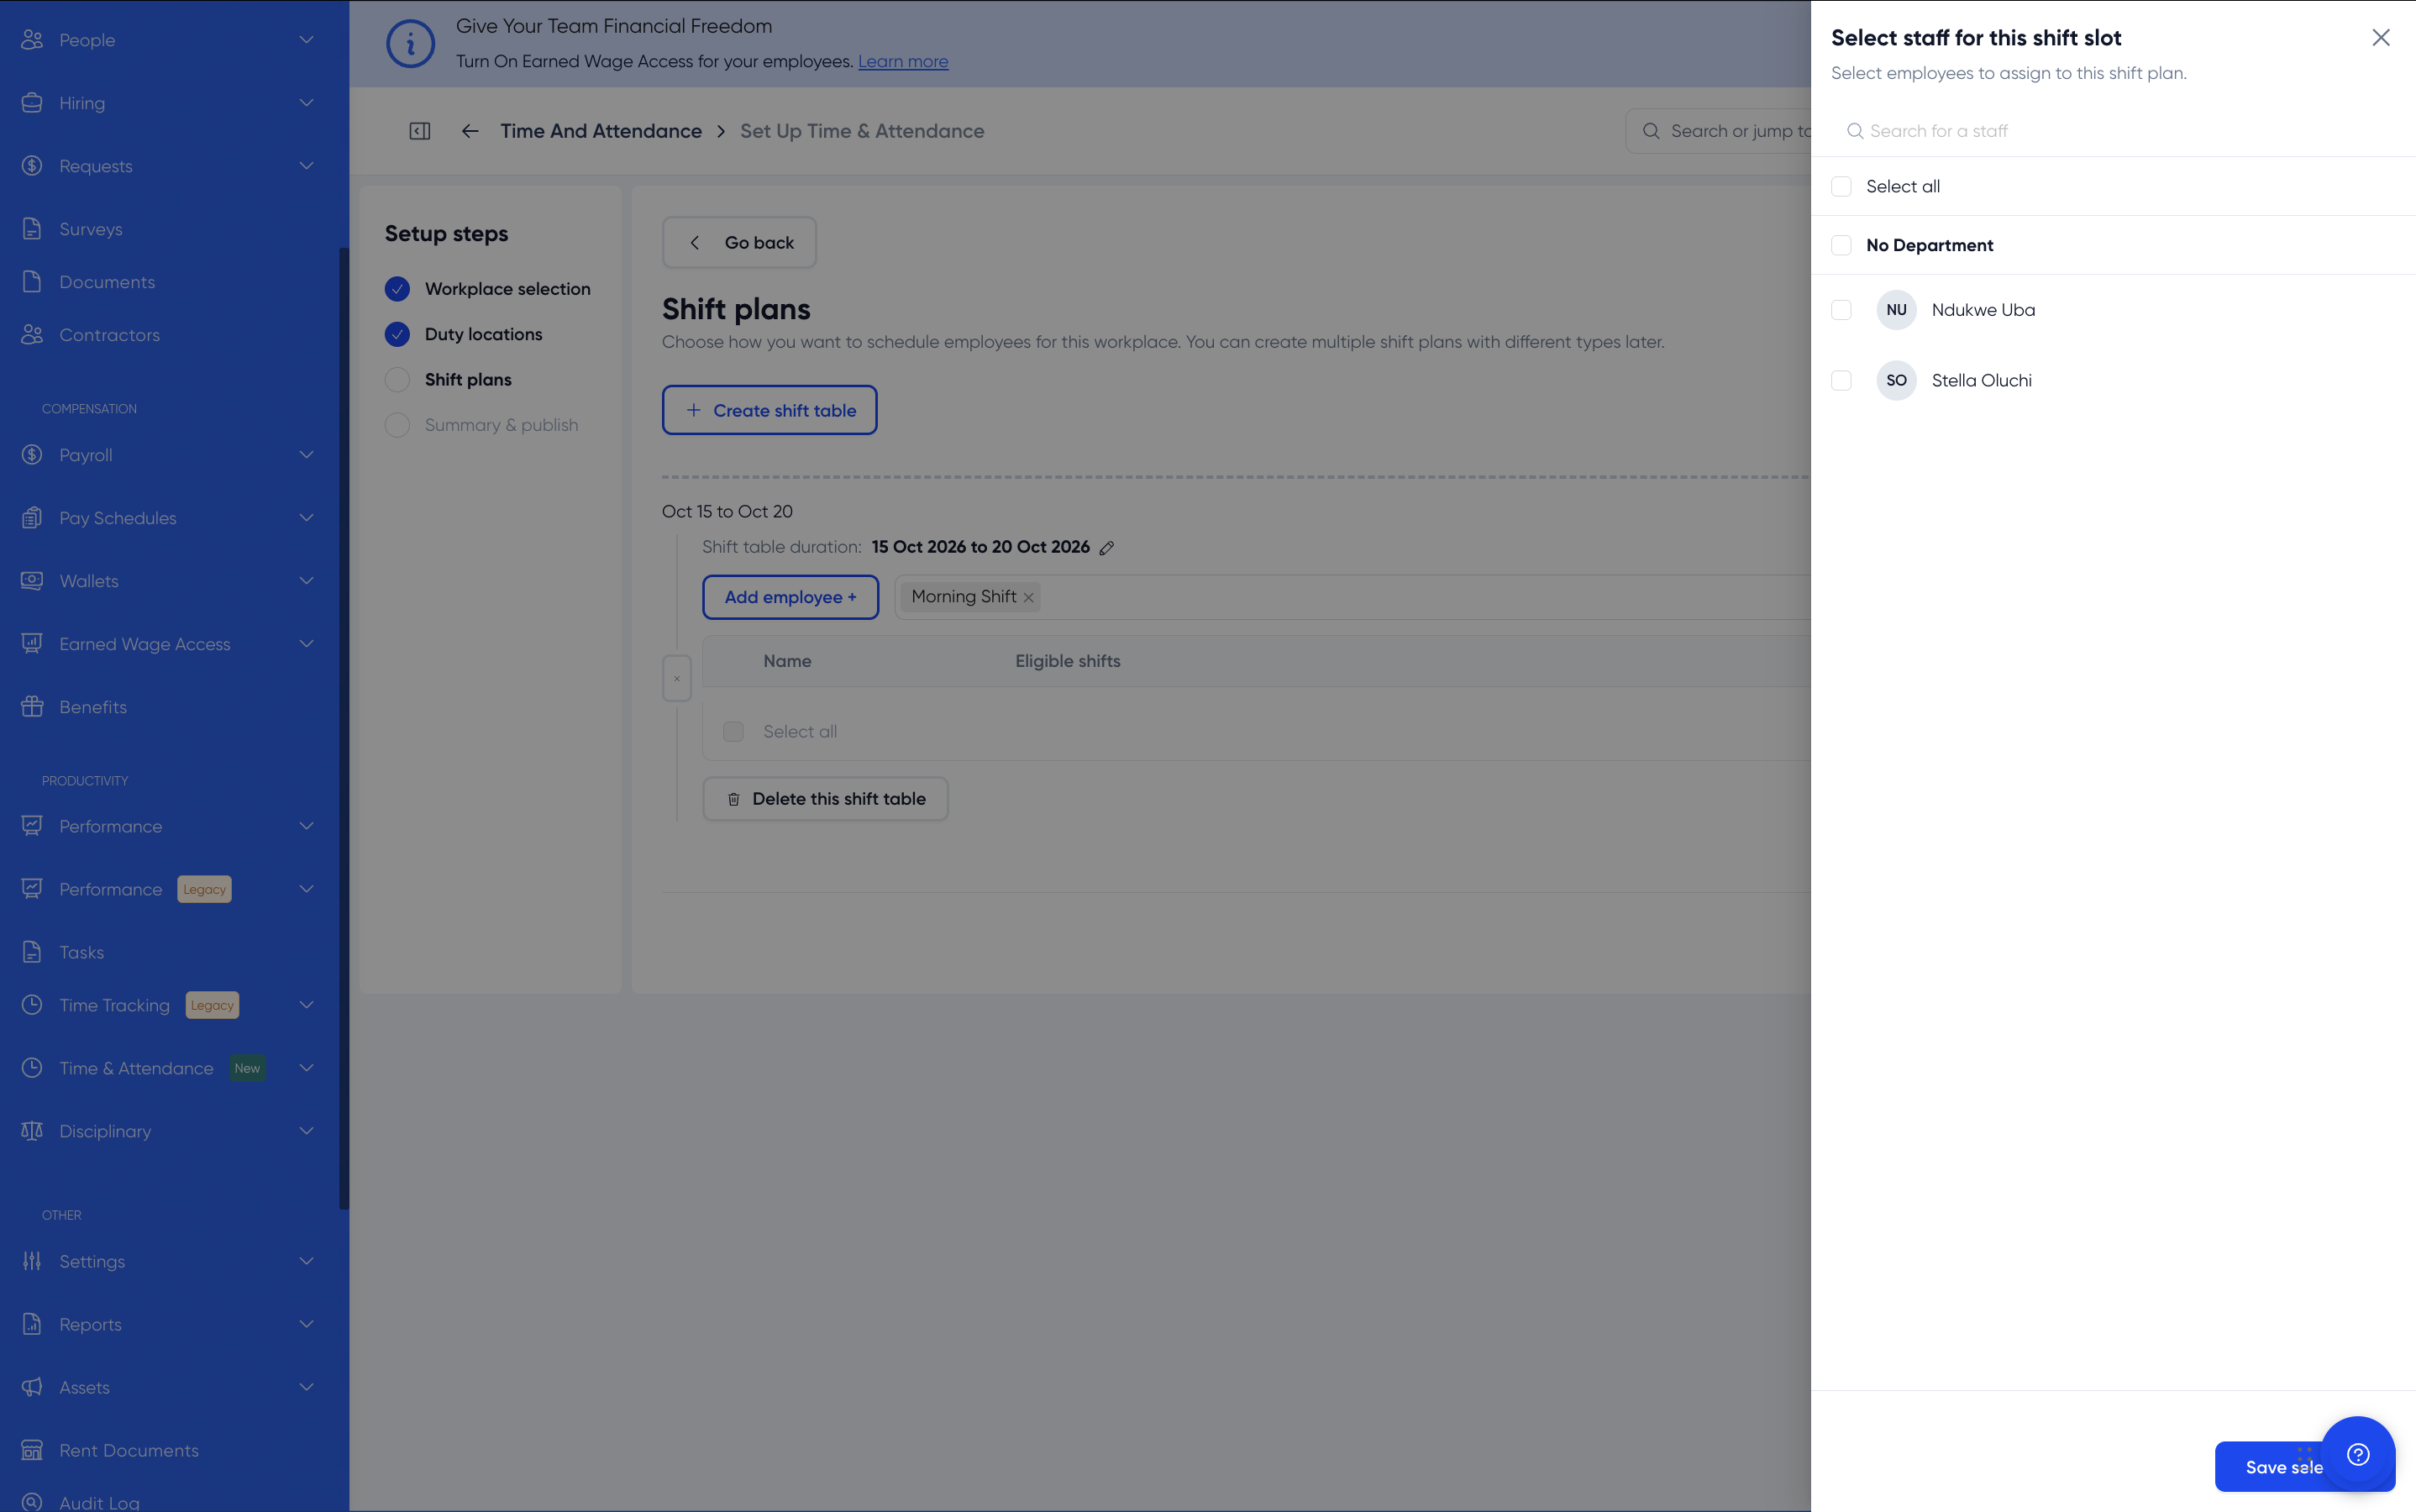
Once the plan and schedule are ready, add the employees who will follow them. In a Rostered plan, assign each employee to specific shifts. In a Flexible plan, set each employee’s weekly minimum.
Before assigning employees, confirm their workplace, duty location, plan, shift periods and dates, and—where applicable—their individual weekly minimum.
-
Add each employee to the correct plan and schedule.
-
Resolve any overlap with another plan or location. An employee cannot be scheduled in two places at the same time.
 Check the schedule: Open each employee’s schedule view and verify the dates, location, shift period, and times. Draft plans are hidden from employees, so review them in the administrator view.